Sea-Picro is a RP2040 based board in the Arduino Pro Micro form factor. Like Sea-Micro, its designed to be a drop in replacement for keyboards wanting an upgrade from ATmega32u4 based pro micros.
There are two variants:
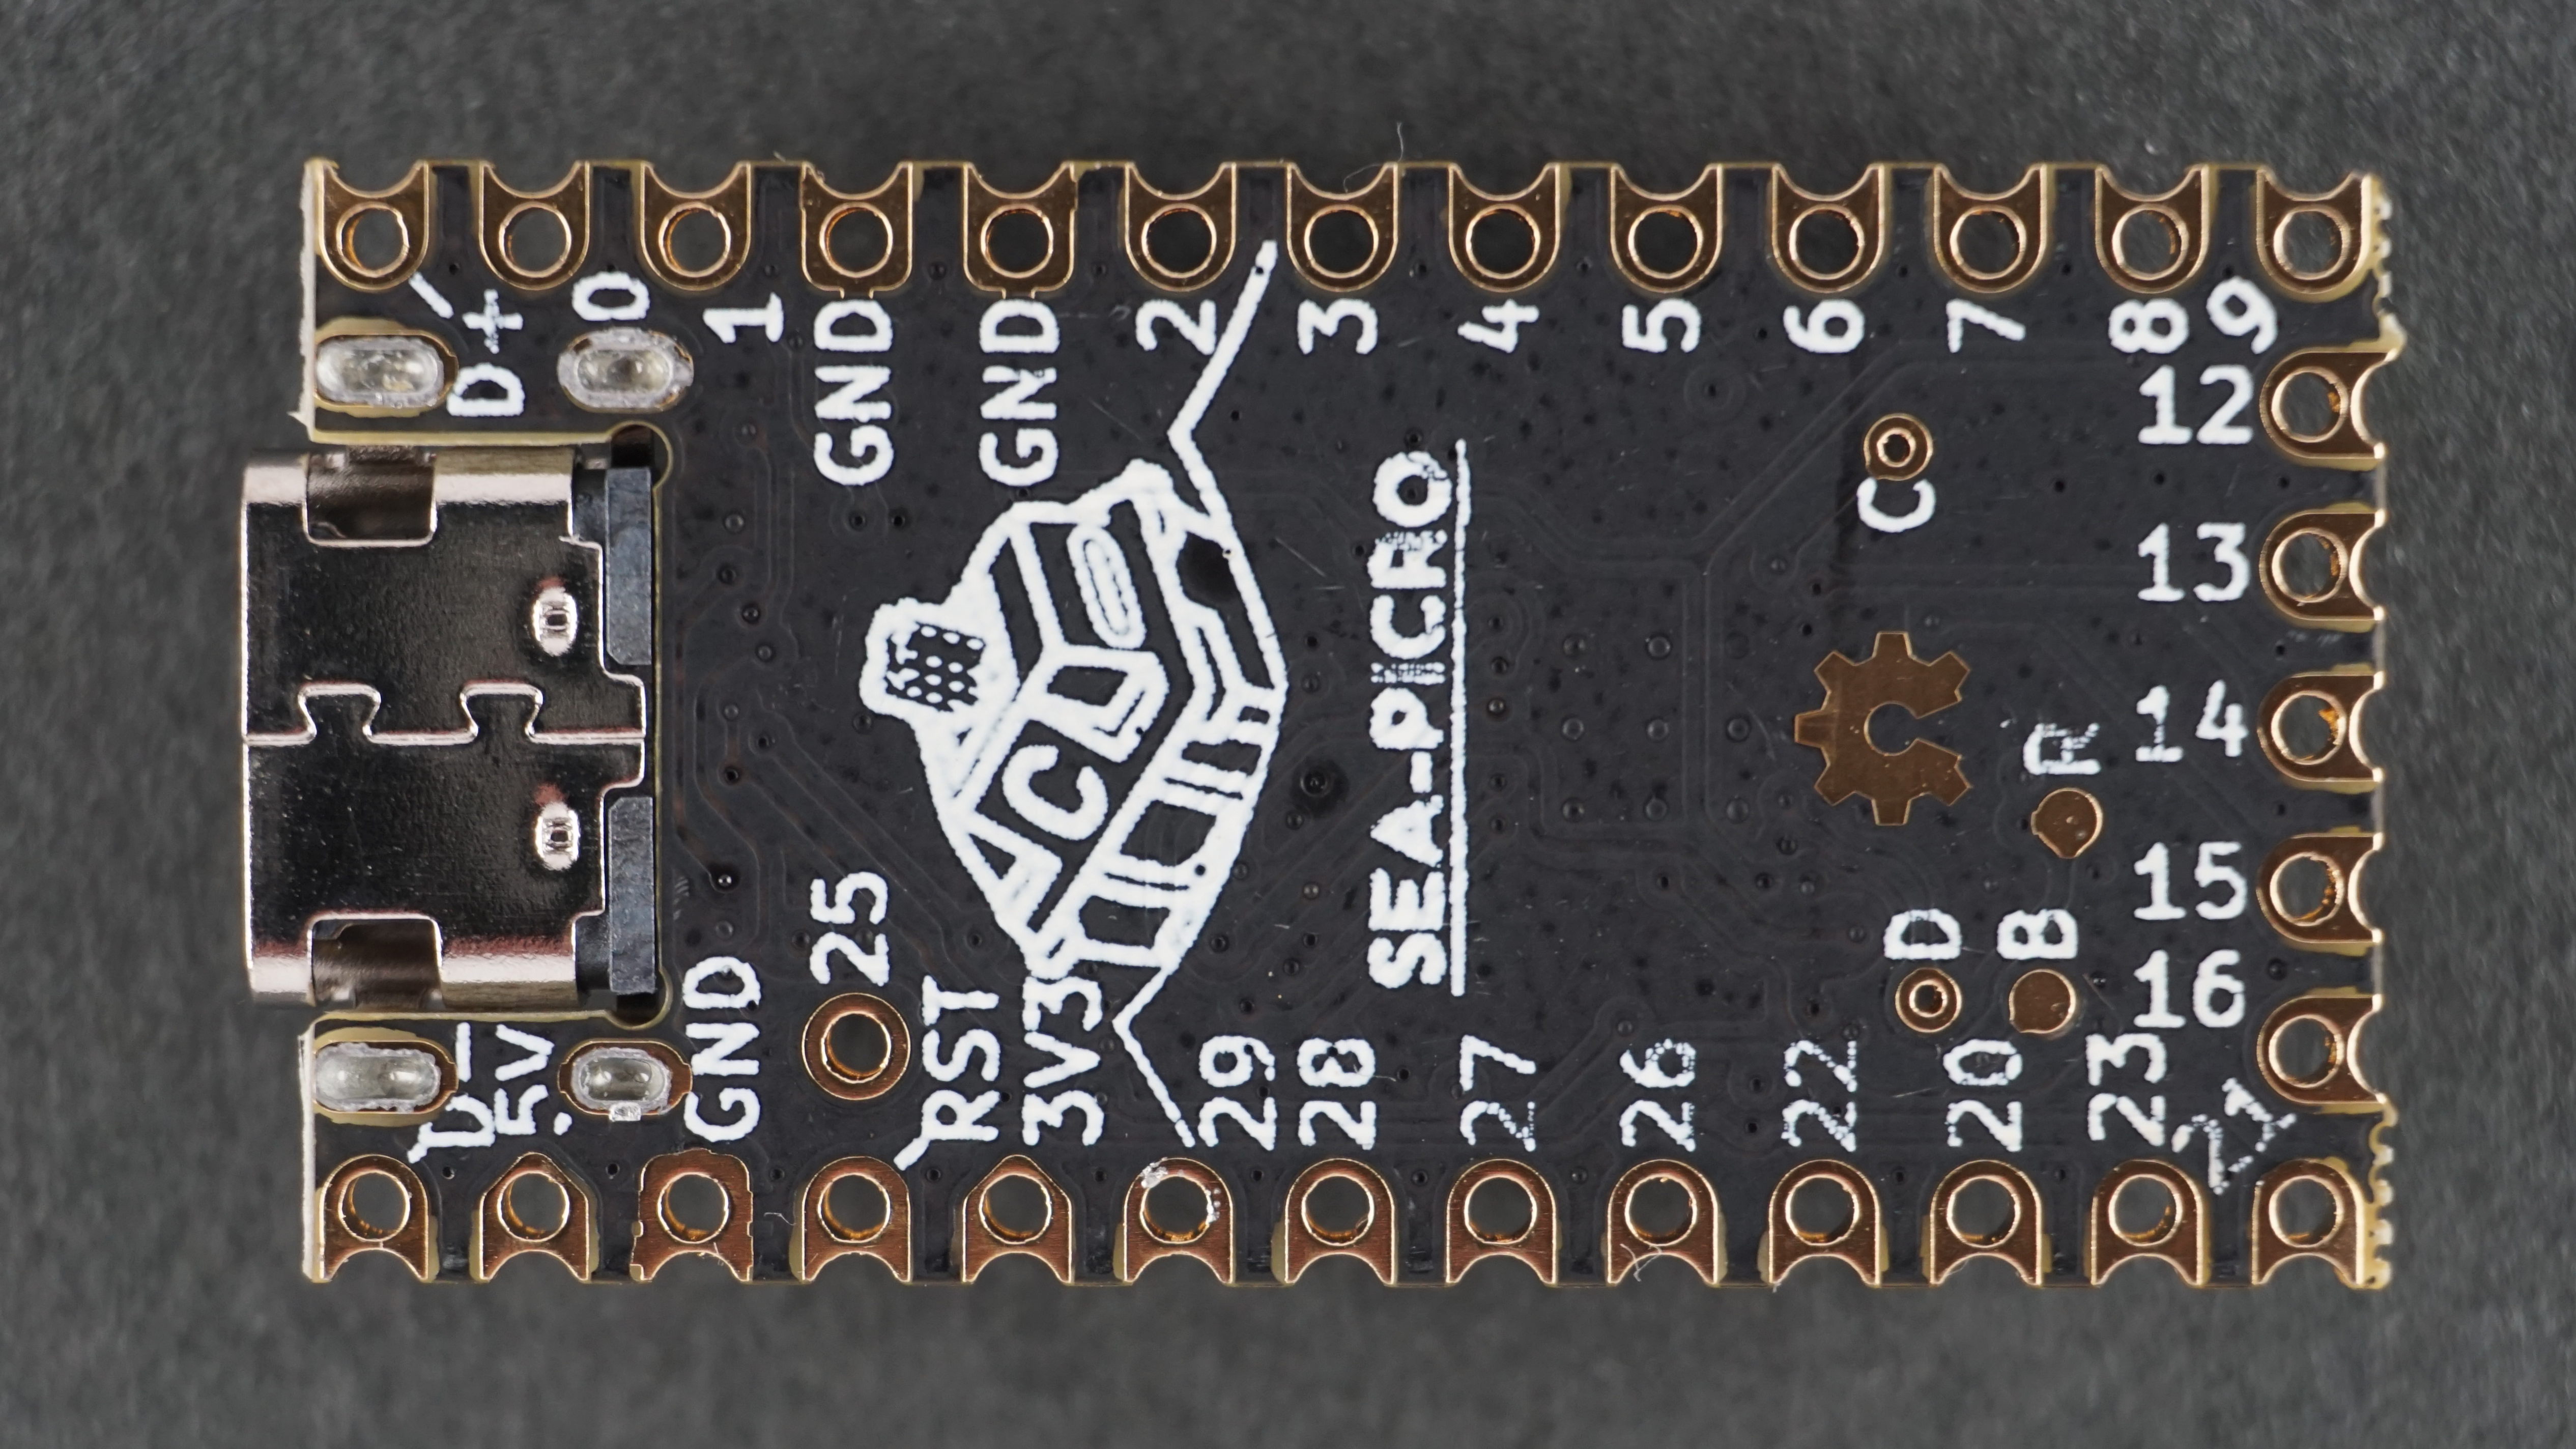
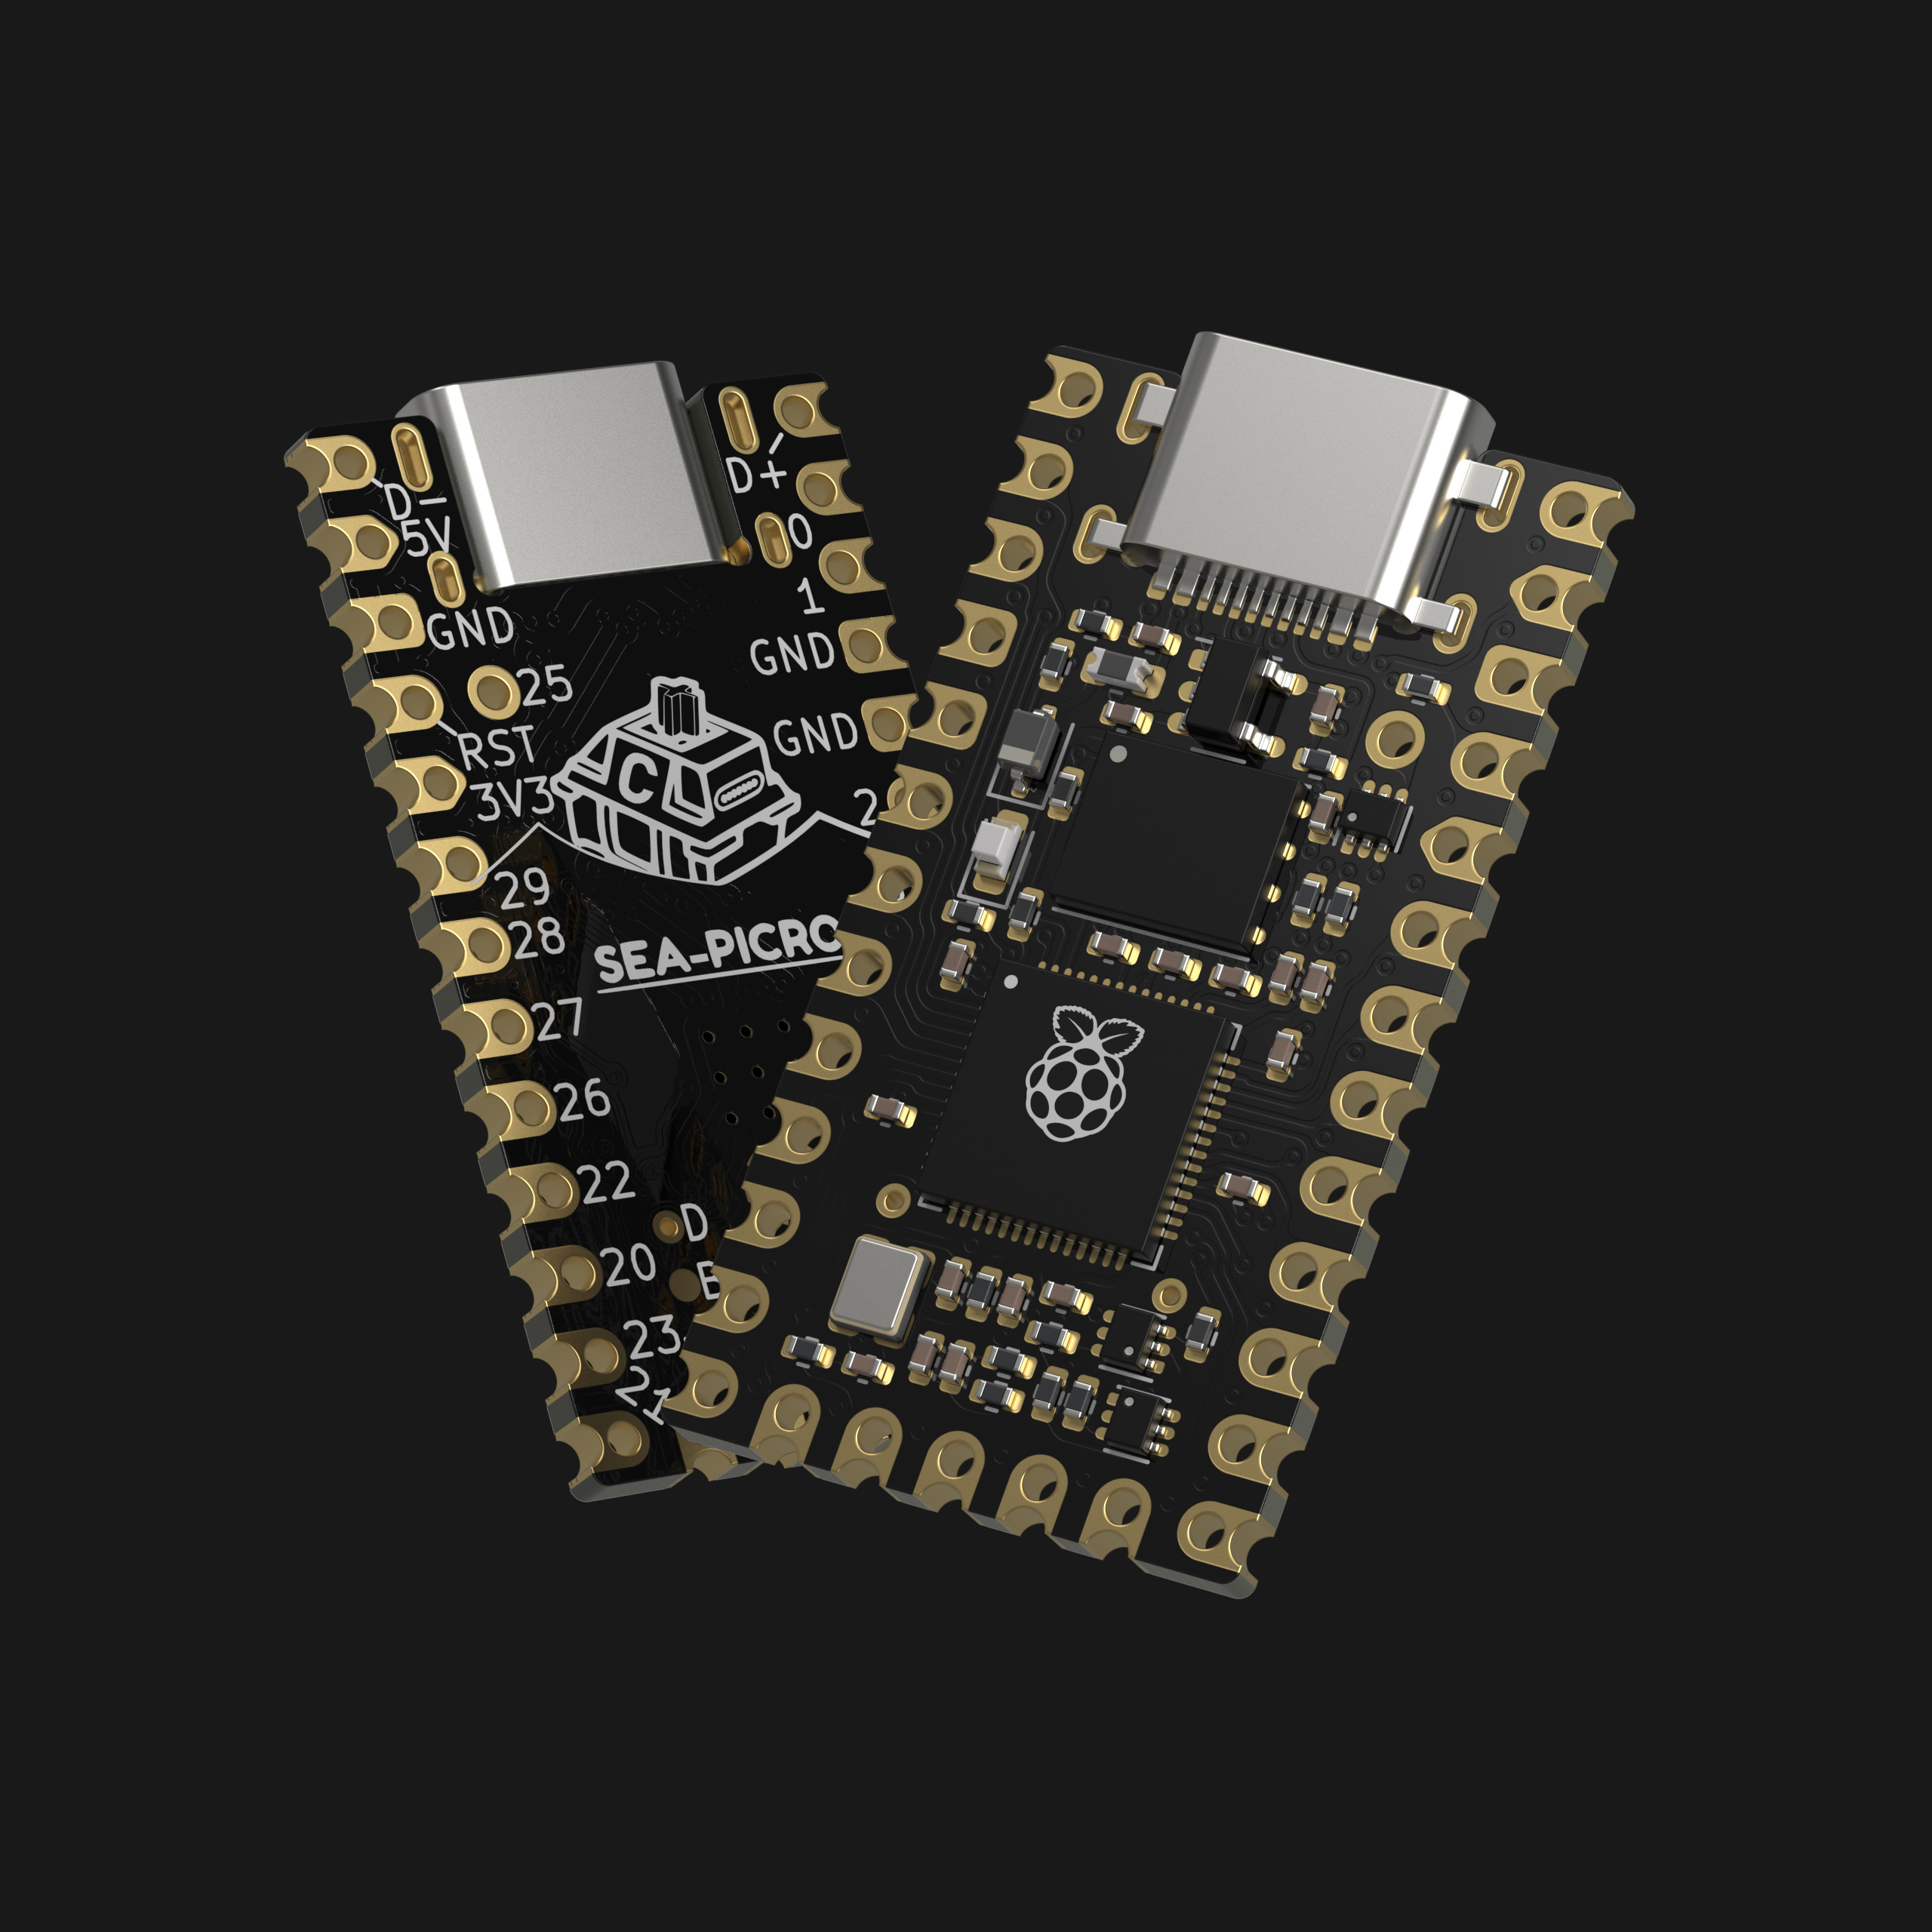
- EXT, featuring an Elite-C pinout, with dedicated 5V RGB LED pin, but without a reset button.
- RST, featuring a pro micro pinout, with onboard RGB LED and reset button.
Sea-Picro can be purchased from CustomKBD.
Sea-Picro EXT
Sea-Picro RST
Features
- Compatiable with most pro micro based keyboards
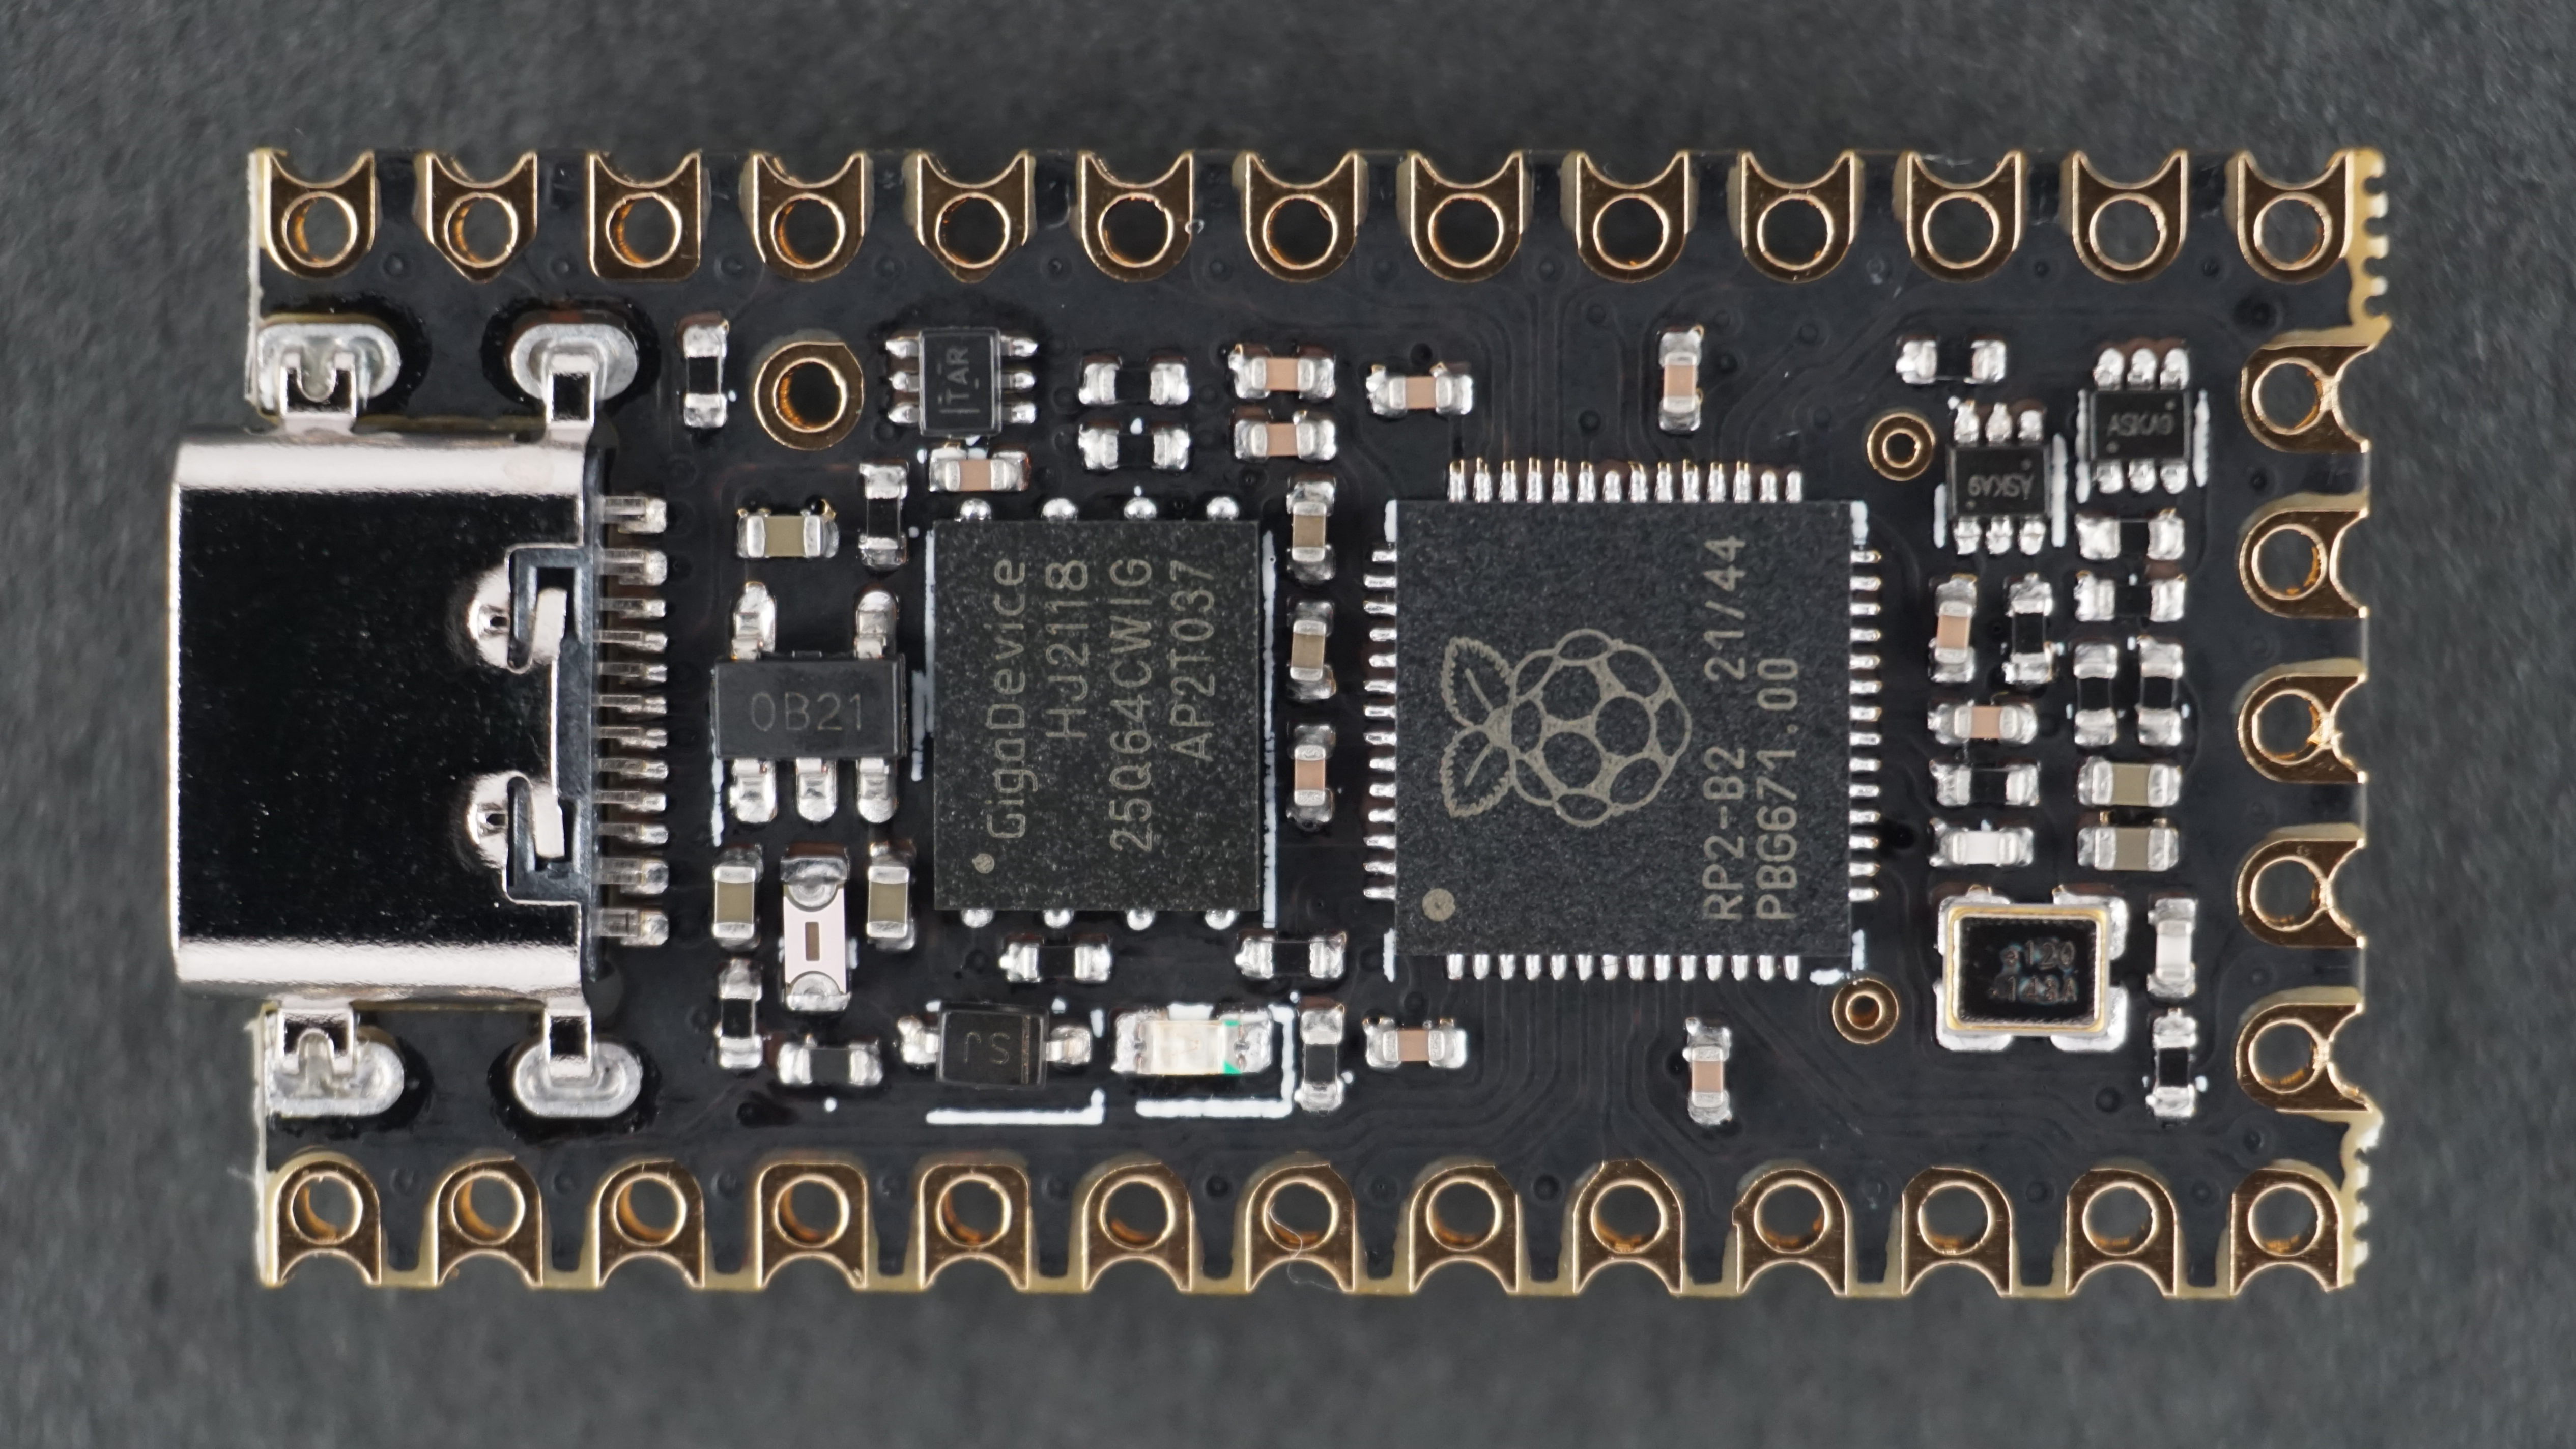
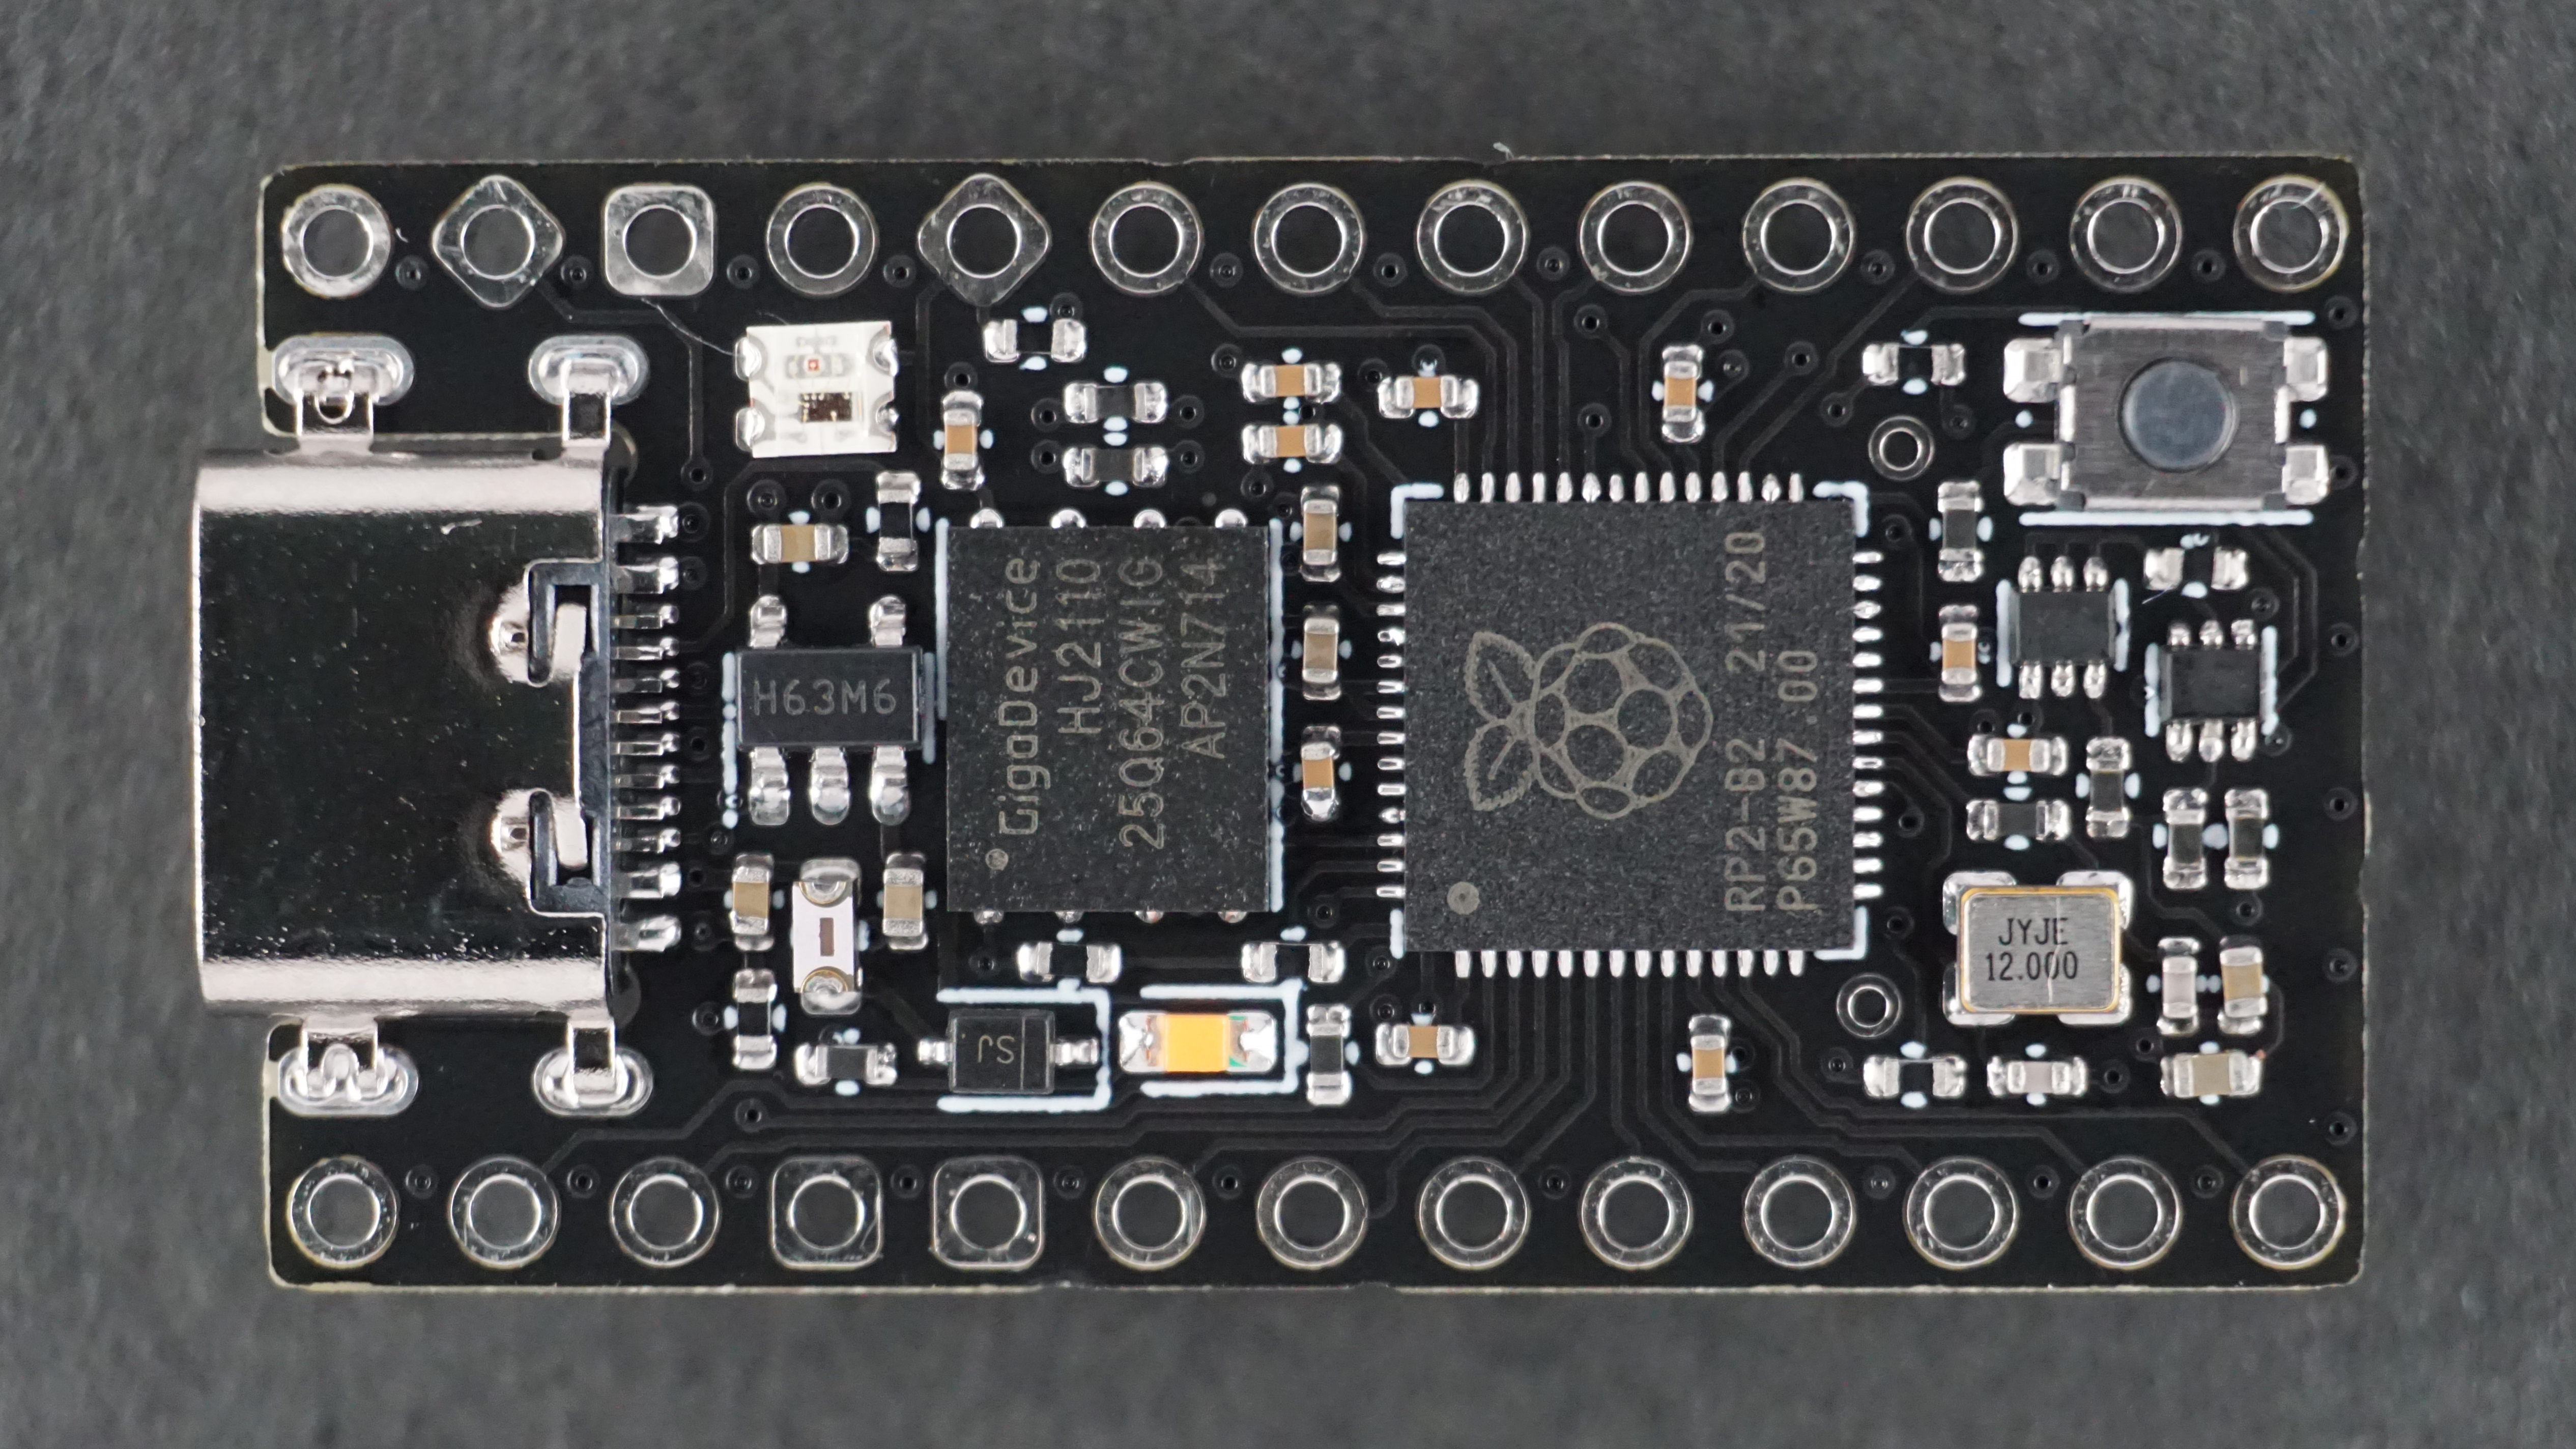
- RP2040 microcontroller, with dual M0+ processors at up to 133MHz
- Mid mount USB-C connector, which is low profile and can’t be ripped off
- Optional Elite-C style pinout, adding an additional 5 IO for large keyboards
- Single button reset / bootloader circuit which changes behavior based on how long it’s held (RP2040 usually requires two buttons to flash new firmware, making it challenging when installed upside down in a keyboard)
- ROM bootloader which prevents board from being bricked
- EXT version has a 5V level shifter and extra pin to drive strings of WS2812 LEDs.
- RST version has a WS2812 LED for use with CircuitPython or as a status indicator on the RST version.
- Onboard power LED.
- IO pinout identical to the Sparkfun RP2040 Pro Micro
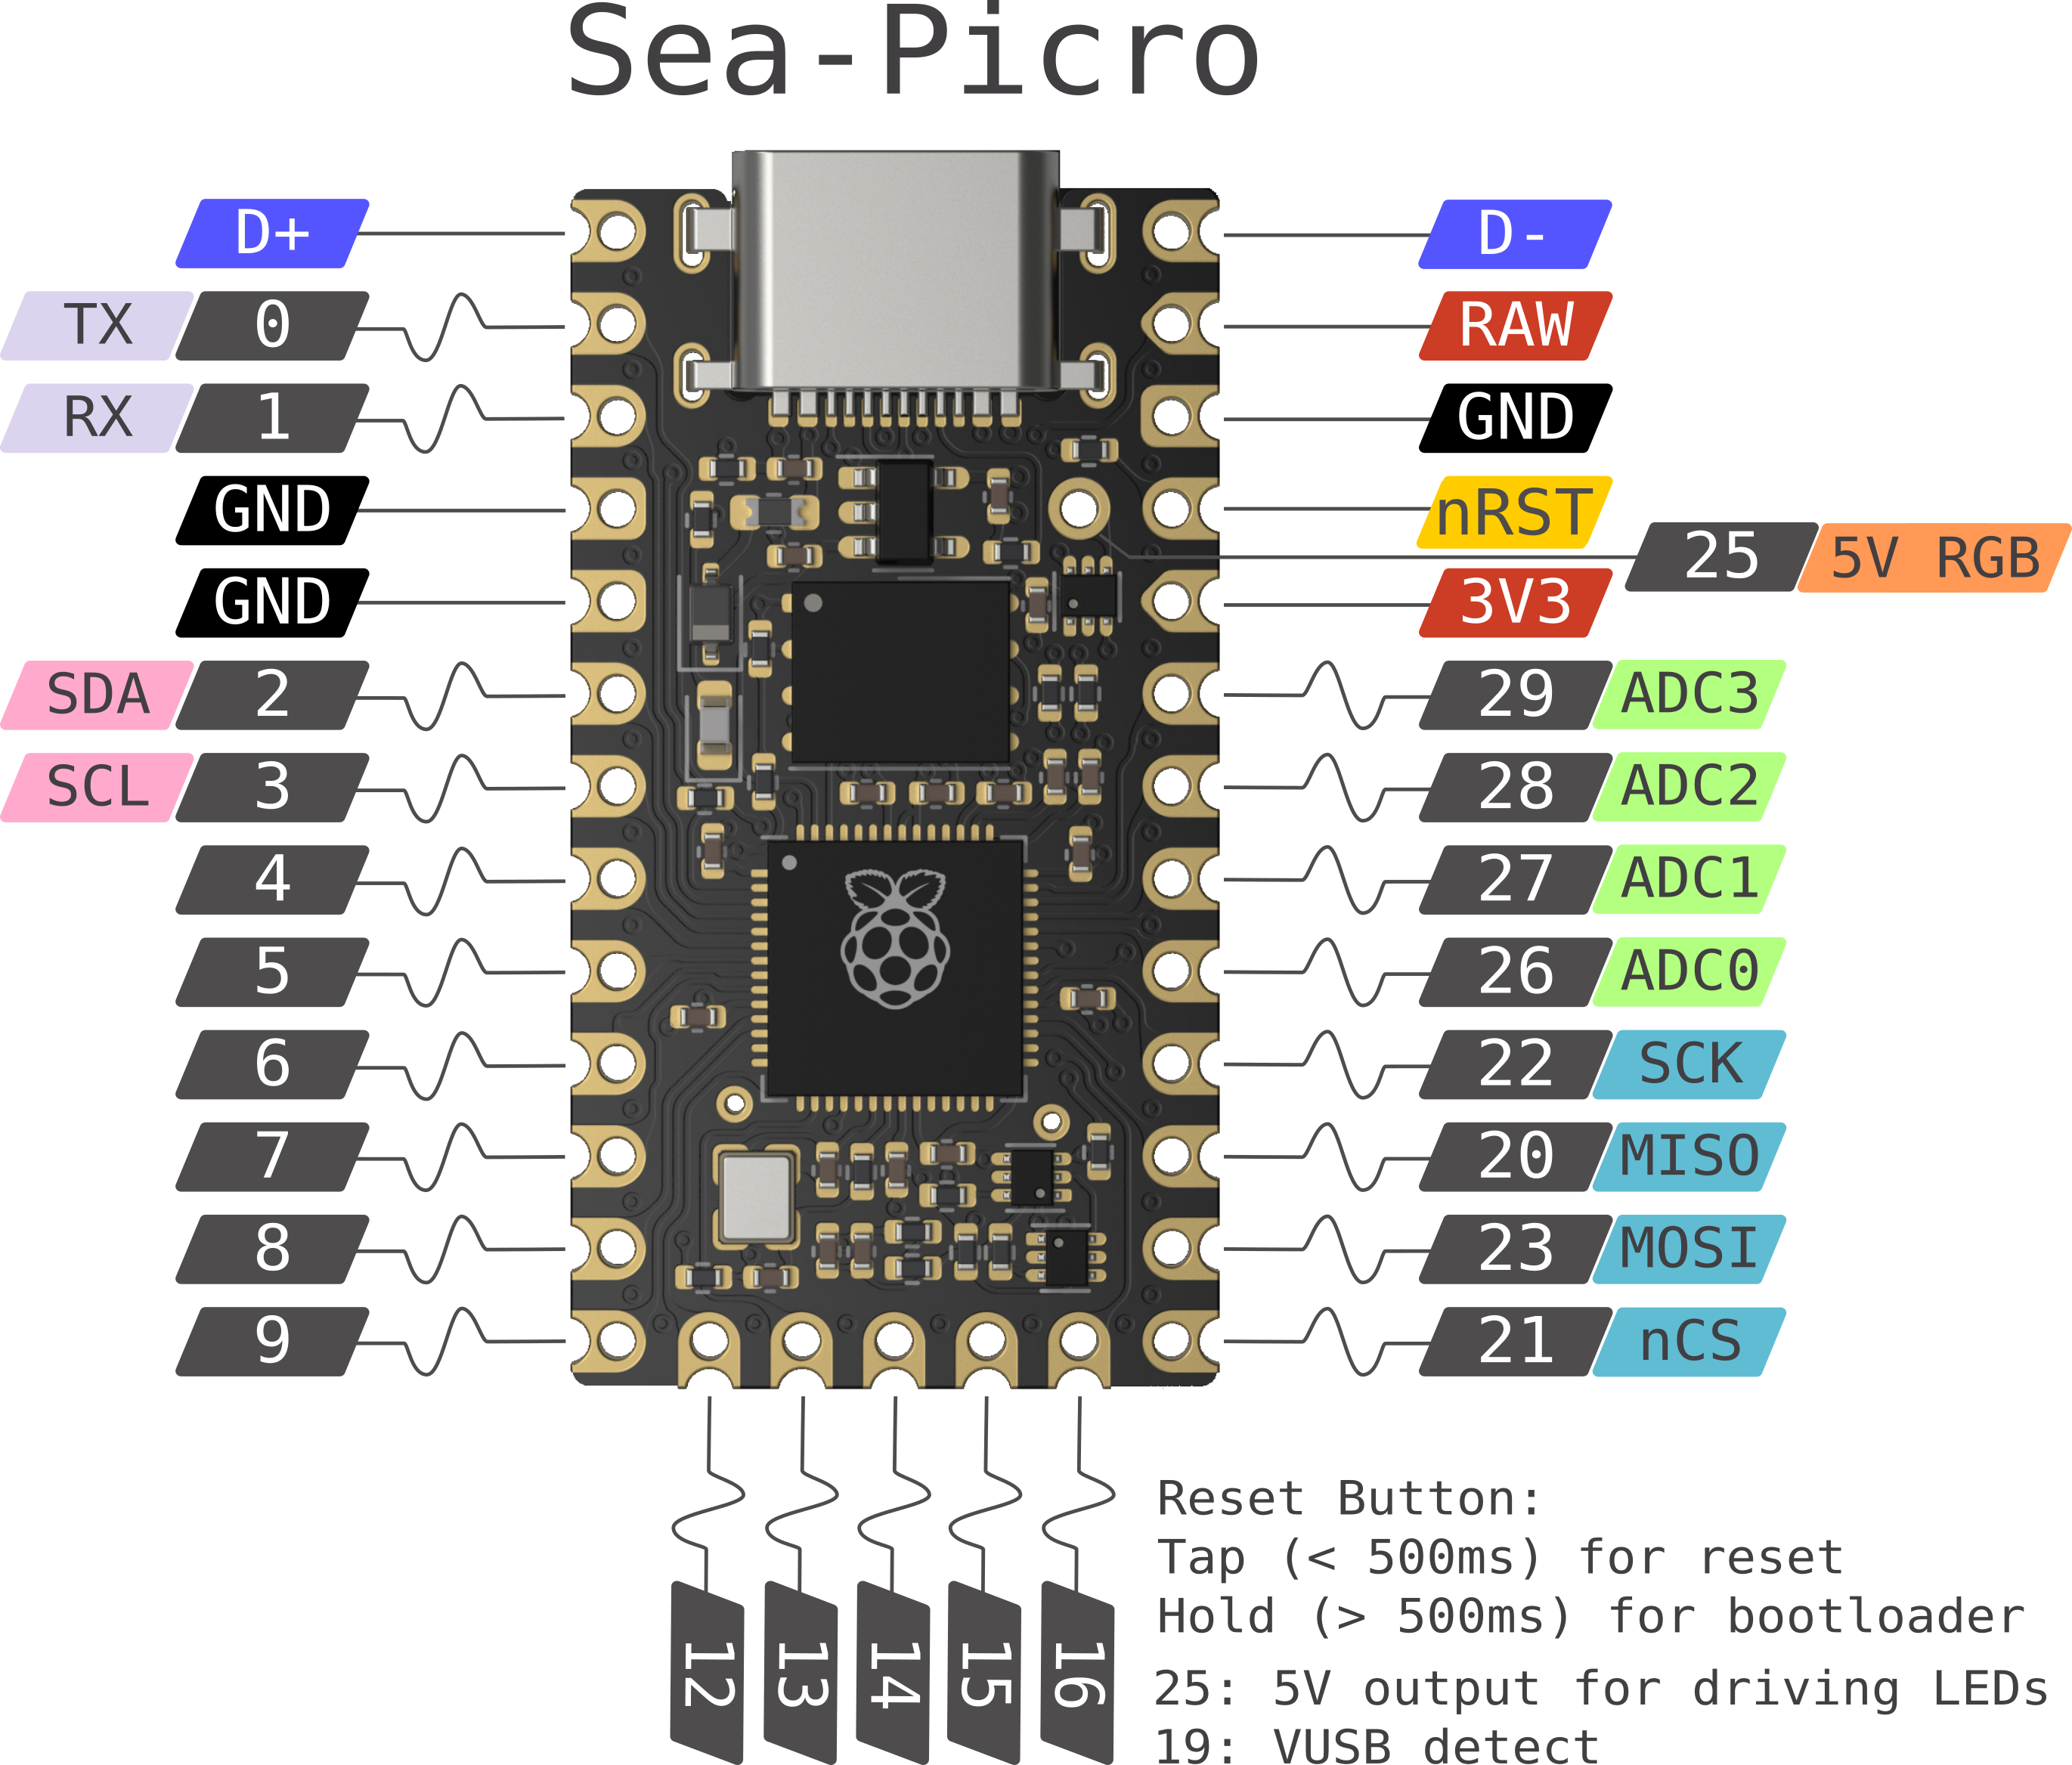
Pinout
Source files can be found on Github.
Documentation
Sea-Picro can work with most existing Pro-Micro compatible keyboards on the market, you just need to recompile the firmware to suit Sea-Picro first. You cannot use an existing .hex file.
To do this, we can use converters in QMK to remap the pins to suit Sea-Picro.
As Sea-Picro has the same pinout as the RP2040 Pro Micro, we can use the promicro_rp2040 converter to remap the pins. An example for Chalice is shown below:
1
qmk flash -c -kb chalice -km default -e CONVERT_TO=promicro_rp2040
Due to the SPI flash chip used on Sea-Picro, you may need to add #define RP2040_FLASH_GD25Q64CS to your config.h file.
You can also build the keymap from scratch following these instructions.
Reset / Bootloader Control
Due to how the RP2040 microcontroller on Sea-Picro functions, the reset button behaves differently to traditional Pro Micro based controllers.
- Tapping the reset button for < 500ms will cause the board to reset and your code to start running again.
- Holding the reset button for > 1 second will cause the board to go into bootloader mode and allow you to flash new code.
QMK has added a “double tap for bootloader” feature for RP2040 boards, however due to the implementation on Sea-Picro this may not work and it’s suggested to hold the reset button to get into bootloader mode.
Flashing
Flashing Sea-Picro is a simple process.
- Compile your code as outlined above.
- Place the board into bootloader by holding the
RESETbutton or using theQK_BOOTkeycode. - Once a drive called
RPI-RP2is detected, drag the.uf2file generated by QMK onto the drive. - The
RPI-RP2drive will disappear and a few seconds later your keyboard will be ready for use.
CircuitPython Firmware
The CircuitPython UF2 that ships with Sea-Picro can be found here if you need to restore it.
Dedicated 5V RGB Pin
Due to the RP2040 microcontroller powering Sea-Picro running at 3.3V, it may not be able to drive the 5V addressable LEDs found on many keyboards. As such is has a dedicated 5V RGB output pin which will drive the LEDs at the correct voltage to ensure smooth operation.
If you run into issues driving the LEDs (e.g. glitching, incorrect colours being shown) consider changing the RGB_DI_PIN to 25 in your keyboards conf.h file and running a wire from the 5V RGB pin to the first LED in the chain.
KiCad Library
If you’d like to use Sea-Picro in your next keyboard, please download the KiCad Library which contains symbols, footprints, and 3d models for Sea-Picro.
KMK / CircuitPython Usage
If you’d like to use Sea-Picro with KMK or CircuitPython, Sea-Picro is flashed with a CircuitPython bootloader out of the box, and to get KMK up and running is simple.
- Download a copy of KMK.
- Unzip it and copy the KMK folder and the
boot.pyfile to the root of the USB driveCIRCUITPY. - Unplug and replug your device to force the
boot.pychanges to be implemented. - Open the existing
code.pyfile on theCIRCUITPYdrive with a text editor and add the below code.
1
2
3
4
5
6
7
8
9
10
11
12
13
14
15
16
17
18
19
20
print("Starting")

import board

from kmk.kmk_keyboard import KMKKeyboard
from kmk.keys import KC
from kmk.scanners import DiodeOrientation

keyboard = KMKKeyboard()

keyboard.col_pins = (board.GP0,)
keyboard.row_pins = (board.GP1,)
keyboard.diode_orientation = DiodeOrientation.COL2ROW

keyboard.keymap = [
    [KC.A,]
]

if __name__ == '__main__':
    keyboard.go()
Shorting the 0 and 1 pins on Sea-Pico should then type a, and you can begin configuring the board.
For more info on using KMK, please see their getting started guide.